By Dýrfinna Tonnudóttir
Barony of Forgotten Sea
Attire
Tools & Materials
- Linen, 2.8 oz/yd2 and 5.8 oz/yd2
- Thread, cotton all purpose
- Beeswax
- Needle
- Buttons
- Twill trim for belt
Women’s Clothing in Rome

With the exception of prostitutes, all women wore an under tunic, with the hem length varying depending on what their daily life was like. Women who worked generally had a hemline between the knee to the mid-calf. Most sources seem to agree that the tunic was made from a large tube of fabric, with sewn darts or fibulae (pins) holding the top edges together. By the 3rd Century, the short-sleeved tunica was the style of choice, and it was worn over the under tunic.
Tunics were made in a wide variety of colors, with fabrics ranging from wool to cotton, with silk being precious and expensive, though available via trade routes. (“Roman Textiles”) A palla, or wrap, and some jewelry often completed the outfit of a well to do Roman woman.
Making the tunica
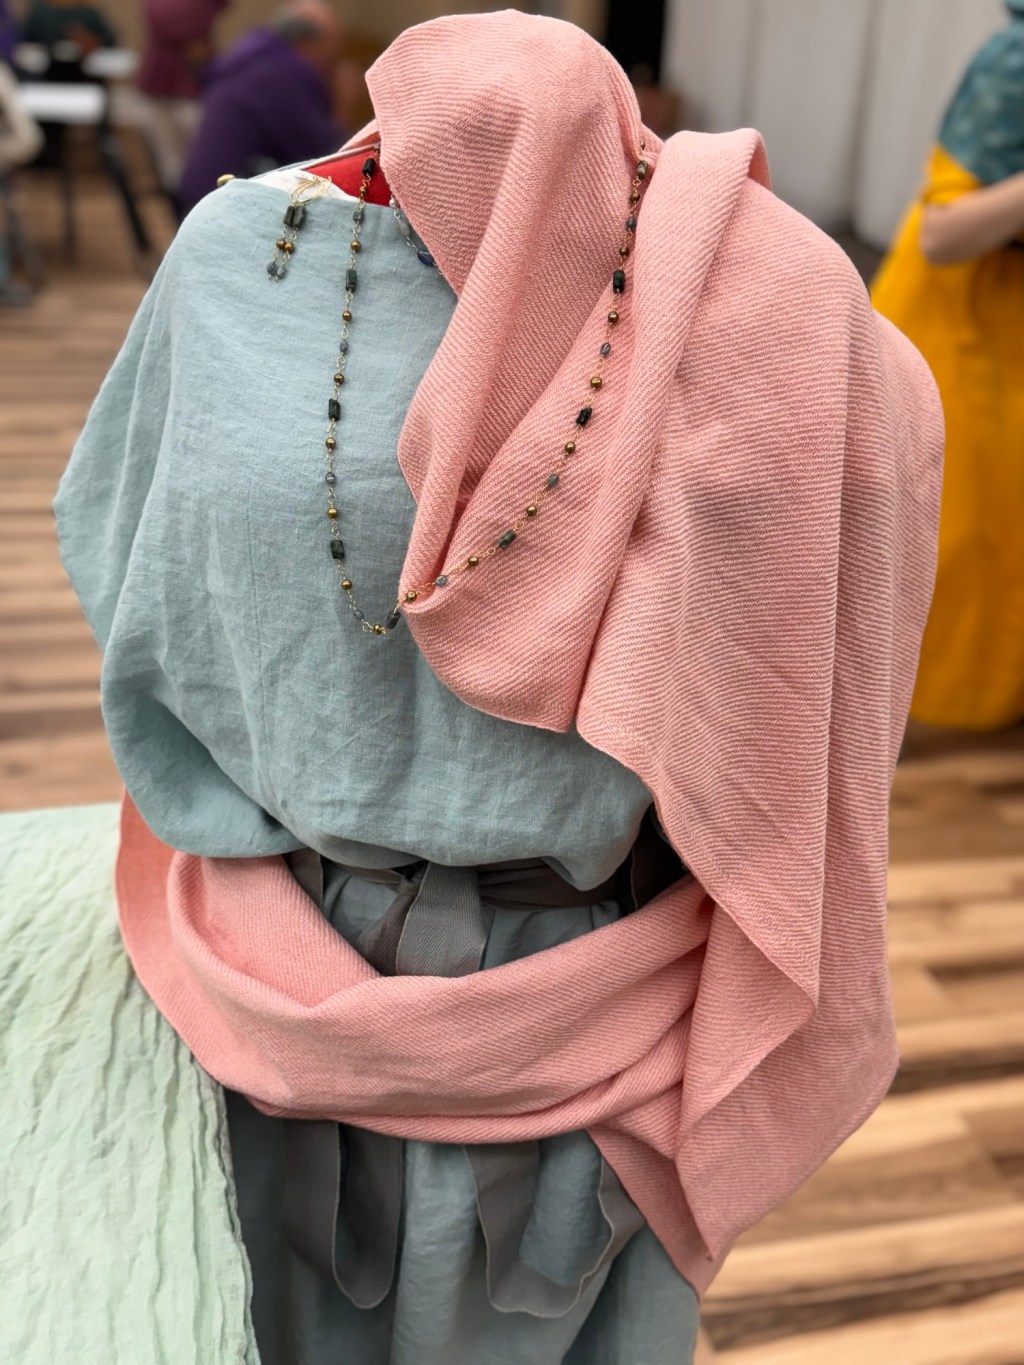
For this project, I started with gauze weight (2.8 oz/yd2), natural linen to hand sew the under tunic. I chose this weight because it can be quite warm in our area during the summer, which is when I tend to dress in Roman clothing to combat the heat. I used myself for measurements, going off the widest part of my body, I added about six inches to create the blousing. I did a running stitch up both side seams, and then felled the seams with a hem stitch. The top and bottom hem I also finished with a hem stitch to keep the edges of the linen from unraveling.
The main tunic I created using all purpose weight (5.8 oz/yd2) linen in a light blue color. While in period, Romans were more likely to have used wool or cotton to create their clothing, I prefer linen for comfort reasons. I also generally have linen on hand, and would have had to make a special purchase for cotton. Wool would have been straight out for the same reasons that I made the under tunic out of gauze weight linen. It’s far too hot to use wool in summer wear.
I used a running stitch to sew both sides of the main tunic and felled the seams and hems with a hem stitch. I had intended to make four bow style fibulae to fasten the tunic at the top, but ran out of time and so they are currently sewn with gold shank style buttons. I would like to eventually replace these with fibulae to have a more period accurate outfit.
The belt I had intended to weave, but purchased from the store instead. It’s a gray twill tape. Romans used strips of fabric and rope to control the length and blousing of their tunics, and women generally wore their belts under their bust. (“Women’s Clothing: 200 – 399 CE”) I had also started to make bow fibulae based off of an extant example to close the top neckline, but they have wandered off and I ran out of time to complete another set.
Adornments
Tools & Materials
- Brass wire, 20 and 24 gauge
- Silver plated copper wire, 24 gauge
- Beads
- Cultured Pearls
- Emerald
- Pale Sapphire
- Aquamarine
- Kyanite
- Jewelry Pliers
- Leather Mallet
Inspirations
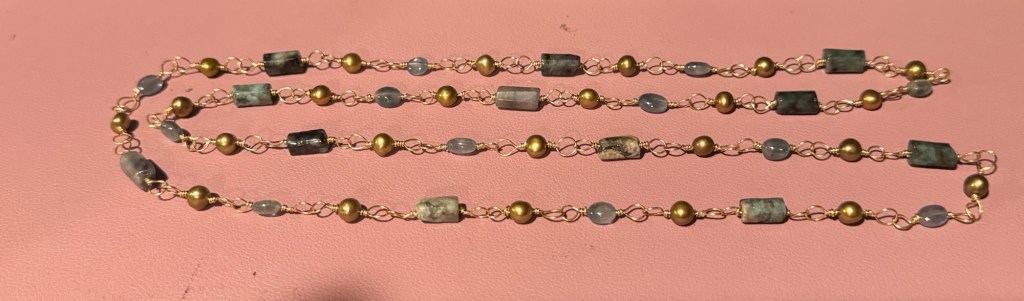
It’s always fun to scroll through the British Mueum’s online collection, especially now that it’s back online after a massive cyber attack earlier this year. The pieces below were what originally inspired me for this portion of my project. Both pieces were found. The necklace consists of twelve polygonal rock emeralds, thirteen pale sapphires, and twenty-five pearls strung on gold links. The extant example measures 39.37 cm (15.5 in) doubled, and my finished piece measures about 50 cm (20 in).
I created my necklace using 24 gauge brass wire, as gold wire is quite expensive at the moment and cost prohibitive. I used the round nose pliers to create each loop and then wrapped the tail of the wire around to create a decorative spiral. That is not specifically seen in the extant example, but it’s a style that I like. I also used pearls that had been dyed gold because I simply liked that better than the natural pearls I was able to get my hands on that were far whiter than the example.
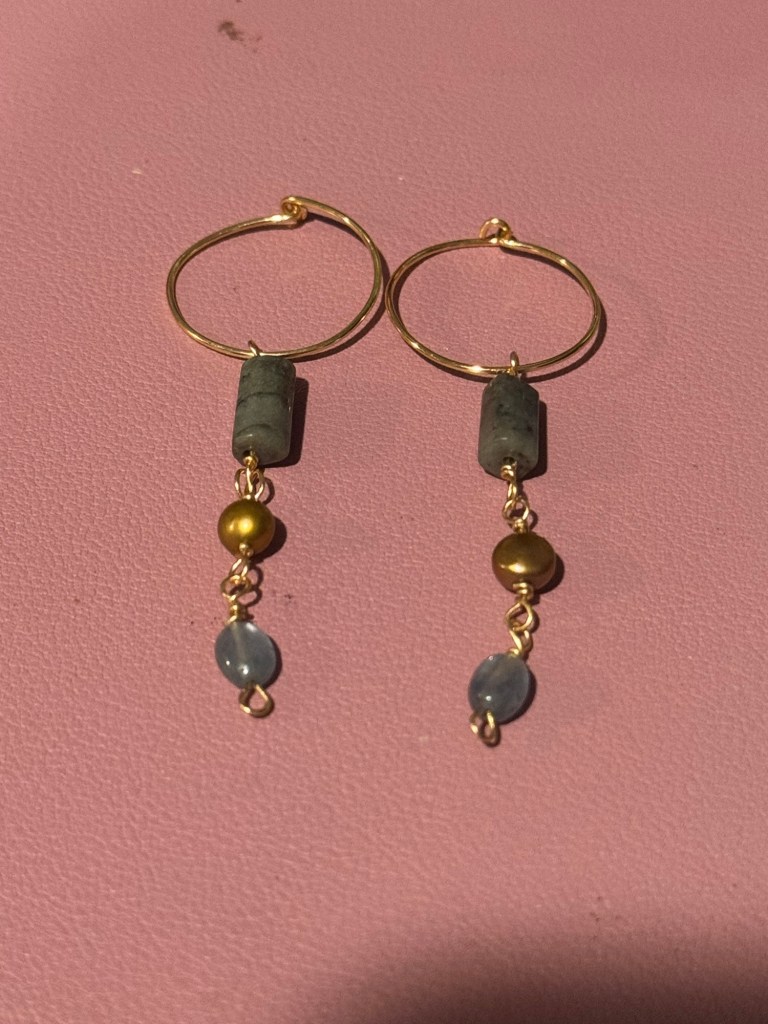
The earrings were found in the same area, and while not exactly the same as the necklace, they contain the same type of stones and are a reasonably matched set of jewelry. Each earring has a penannular gold ring and a pendant with an emerald in a square setting, a pearl and a pale sapphire on gold wire. The earrings are about 2.25 inches (5.71 cm) long, and it appears that at one point the wire with the stones was soldered on to the hoop – a possible older repair that was not done with the other earring.
In my recreation, I used 20 gauge brass wire to create the hoops, and then used the leather mallet to work harden them so that they maintained their shape a little better than if left alone. Again, I’m using brass wire because gold wire is currently too expensive for me to use for this project.
I did attempt to create the emeralds in a square bezel setting, but was unsuccessful at my current skill level at getting the bezel to bend and secure the stone in place. It is something that I would like to try again in the future as I hone my skills. I have included the failed attempt in my display to show what I have learned – which is how to solder the bezel into a loop and fit it to a stone for setting.
The second necklace I made is loosely based on the below example, also at the British Museum, that was found in Antaradus. It’s made of twenty-two gold wire links with a pearl between each loop. It measures 32.20 cm (12.67 in) in length. In the example, many of the pearls had already been lost to time.
Rather than create this piece in gold wire, I used 24 gauge silver plated copper wire and cultured pearls with aquamarine and kyanite beads. My choice was for financial reasons as well as aesthetic ones. I had the materials on hand, and I liked the way that they looked together.
I used the round nose pliers to create the loop bars, threading each stone on and linking them together. I did use a premade hook and eye clasp for this one, as I was running low on time to create one on my own. The finished piece measures about 50 cm (20 in) in length.
Finished Projects
The earrings I made used a wider hoop, and that was an artistic choice, as was the loops between the stones rather than the gold beads. It means that the earrings were slightly longer than the extant pieces, but I feel like the set that I created goes very well together. I learned a lot during this project and cannot wait to continue.
Weaves
Tools & Materials
- 8 Shaft Loom, 36” wide
- 20 dent reed
- Jaggerspun Zephyr in Mythical Pink (50% silk / 50% Merino wool)
What is a palla?
A Roman friend of mine recently asked if I would be willing to weave her a palla – a wrap worn by affluent Roman women. My friend is petite, and did not like the bulk of a traditionally sized palla so this particular item was created specifically with her measurements in mind.
In Ancient Rome, a palla was a rectangular piece of cloth that wrapped around the body – in some cases even covering the head as in the sculpture of Livia Drusila to the left. The sculpture shows the palla winding around her body, over her left shoulder, around her right side, and also over her head.
As I designed this to my friend’s measurements, the goal was around 30-32” wide and four yards long. The weaving structure is a straight draw twill, i.e. the warp was threaded through the heddles in shafts 1, 2, 3, and 4 and repeated for all 600 warp ends. The tie up mimics the threading, as does the treadleing pattern. I chose not to use a floating selvedge for this piece. I used a 20 dent reed with two ends per dent to achieve the finished structure.
In period, we have evidence of warp weighted looms and two beam looms for textile creation but I chose to weave this piece on my more modern loom for ease and comfort. Both twill and tabby weaving structures were common in period, but I chose to go with twill as it provides an interesting decorative texture to the finished piece. (“Dulcia’s Roman Closet – Roman Textiles”) I measured the warp and chained it into bundles of 100 ends while I was camping in Graham Cave State Park – a neolithic cave site that made the project feel a little more plausible.
From frescoes discovered like the one to the right , it can be extrapolated that pallas were often dyed in various shades and colors – including the pink that was chosen by my friend. They were more likely to have been made out of wool, and not the wool blend that we chose, but I like to think that if silk was not so astronomically expensive, many would have chosen the same material as we did. The finished product came out so very soft!
Finishing Touches
In all, it took me about a month to measure out the warp and weave the four yards of fabric. I had an issue with the first threading, and wound up having to unweave about 20” of work to correct some warp threads that were going through the heddles in the wrong order. I was pleasantly surprised how well the twill pattern showed up on the finished piece, especially considering that both the warp and weft threads were the same color.
There are extant examples of fringe in Roman clothing – in frescoes, paintings and statues. I gave my friend the option of either having fringe on the finished product or doing without. In true helpful fashion, my friend had no preference on whether the piece had fringe. Since I hemmed the tunicas in my other project, I elected to continue the finishing process with the palla and used a hem stitch of leftover yarn from the project to stitch the hem down and into place.
I did a wet finish on the piece using some no rinse delicate fabric wash, and used my iron’s steam setting to press the hems into a nice and finished looking shape. If I had this to do over again, I would like to play with incorporating some additional weft colors into the ends to replicate some of the patterning that you can see in some examples. I do like the overall width of the finished piece, so I’m not sure if I would go the full yard (or wider) width that does appear in the extant examples.
Works Cited
British Museum. Necklace, 2nd – 3rd Century. 1917,0601.2732.
British Museum. Necklace, 4th Century. AF.323.
British Museum. Pair of earrings, 4th Century. AF.324-325.
Felicisimo, Angel M. Livia Drusila. Statue of Livia Drusila wearing a stola and palla. 2015. Flickr, https://upload.wikimedia.org/wikipedia/commons/6/65/Livia_Drusila_%2815708884953%29.jpg.
National Archaeological Museum of Naples. The Surgeon’s House. Fresco from Pompeii 50-79 AD. (9018).
“Roman Textiles.” Dulcia’s Roman Closet, https://sites.google.com/view/dulciasromancloset/roman-textiles. Accessed 20 September 2024.
“Women’s Clothing: 200 – 399 CE.” Dulcia’s Roman Closet, https://sites.google.com/view/dulciasromancloset/roman-clothing/women-200-399-ce?authuser=0. Accessed 3 September 2024.


Leave a comment